3 Panoramic Photography Techniques You Can Try This Week
Have you ever stared in awe at a mesmerizing panorama of the Milky Way or the Grand Canyon? Maybe you’ve wondered how you might achieve something similar. Many photographers are intimidated by the idea of panoramas, but it’s not as overwhelming as it might seem. With the following tips, you’ll soon be creating and mastering your own panoramic photography.

Photo Credit: Glenn Randall Photography
Learn the Secrets to Great Panoramic Photography
Using the “Golden Hour” as a general time reference for photography works well for panoramas, too. The golden hour refers to the window of time between the first hour (or two) before and after sunrise or sunset. Sunsets and sunrises produce a golden glow of light that is undeniably beautiful. You’ll also find the shadows during this time of day are not too harsh or overwhelming, as they are when shooting in full sun.
Use overlap and stitching to create the illusion of a single shot. You’ll want to overlap your photos by about 20 to 30 percent; the overlap will come in handy when you begin to stitch together multiple images. Photoshop and PTGui are the two most widely used photo stitching programs, but there are free options available as well.
Shoot in RAW format, as this allows for the highest possible photo quality–a must with panoramic shooting. RAW format photos don’t lose the original image information. With RAW format you’ll never have to worry about making an irreversible mistake to the file. Also, JPEGs and other photo file formats are known to lose quality with each save and to fail to retain the original image information.
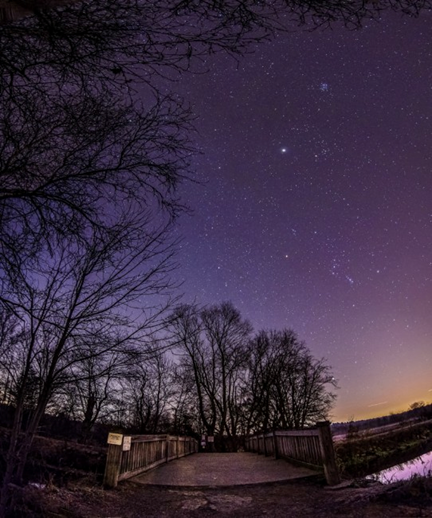
Photo Credit: John Davenport, Phogropathy
Go Outside the Box With Vertical Panoramas
Some fundamental strategies remain crucial to all panoramic photography, including taking lots of photos with overlap and shooting in RAW format. However, the overlapping with vertical shots should be between 40 and 60 percent.
Make sure to shoot with a wide-angle lens and wide aperture. A steady and stable tripod is essential to avoid movement blurs. The camera should be set up so you can pan the camera in one direction without the need to readjust. You will be moving the camera from almost straight down to completely toward the sky. Consider using an “L” bracket or a panoramic bracket.
Since Photoshop and most other editing software are set up to handle horizontal panoramas, it’ll take a little extra tweaking to get your photo to do exactly what you’d like it to do.
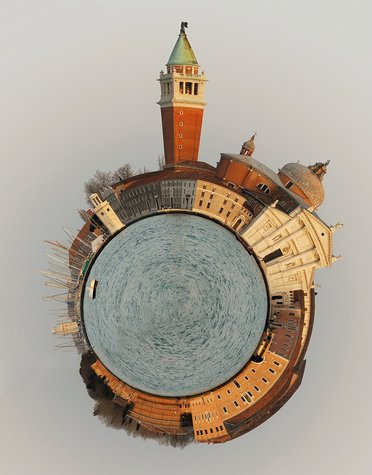
Photo Credit: Photojojo
Create Your Own Little World
Using the polar panorama effect, you can create your own little planet from panoramas or landscape photos. Photoshop is most commonly used for this particular effect, but GIMP has a similar feature as well. It’s a fairly simple process, but there are a few things you should keep in mind before trying.
The best little planets are constructed from panoramas that have a ratio of 2:1, and the wider, the better. You can play around with different ratios to achieve different effects.
Choose a shot that has clear skies and a pretty clear foreground. The middle of the photo should contain most of the detail, as this makes for a more planet-like result. An image of an open park or playground on a clear day would be a great photo option to create your little planet.
While the above few tips and tricks give you some ideas to begin capturing your own panoramas, there are plenty of tutorials on the Internet that can give you more in-depth guidance on capturing and attempting various photo effects. Go capture something beautiful!